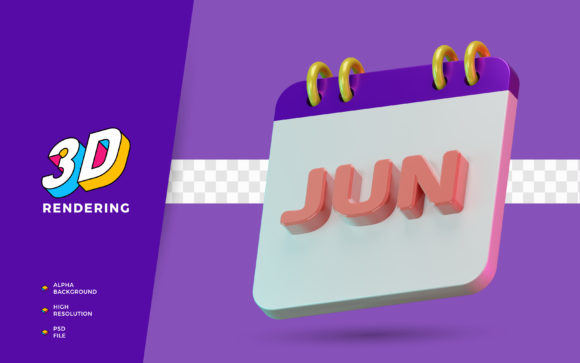
How June Calendar Month 3D Rendering Builds Structure for Visual Planning
A calendar is one of those tools everyone uses but few stop to refine. When you add 3D rendering to a monthly calendar view, the result is more than a decorative visual. A June Calendar Month 3D Rendering becomes a planning asset that can anchor your workflow, clarify your timelines, and help you communicate schedules more effectively. Whether you are a freelancer mapping out project milestones, a small business owner coordinating team tasks, or an educator preparing a month of lessons, this approach brings spatial clarity to temporal planning.
The idea is straightforward: instead of a flat, two-dimensional calendar grid, you work with a rendered three-dimensional representation of the month. The depth, lighting, and perspective make dates, events, and deadlines more tangible. You can see the flow of weeks at a glance, identify gaps or clusters of activity, and share a view that feels more like a physical object than a spreadsheet. This article walks through what a June Calendar Month 3D Rendering is, where it fits into real workflows, and how to integrate it smoothly into your own process.
What a June Calendar Month 3D Rendering Actually Is
At its core, a June Calendar Month 3D Rendering is a digital or printed visual that represents the 30 days of June in a three-dimensional format. The rendering can include elements like raised date blocks, shadow effects, layered event markers, and perspective angles that simulate depth. You might create it using 3D modeling software, a specialized calendar tool, or even a design platform with 3D capabilities.
The rendering is not just a static image. It can be interactive, allowing you to rotate, zoom, or click on individual dates to reveal details. Alternatively, it can be a final render used for presentations, reports, or planning boards. The key distinction from a standard calendar is the spatial dimension. That extra depth changes how you perceive time blocks, deadlines, and the relationship between events across the month.
This format sits at the intersection of design, productivity, and communication. It is equally useful as a personal planning tool and as a visual aid for team coordination. The June focus matters because each month has its own rhythm, holidays, and seasonal shifts. June often marks the end of spring projects, the start of summer schedules, and a transition period for many businesses and educational institutions. A 3D rendering tailored to June helps you visualize that specific context.
Where a 3D Rendered Monthly Calendar Fits in Your Workflow
Understanding where this tool fits in your process is more important than the rendering itself. A June Calendar Month 3D Rendering is not a replacement for a task manager or a project plan. It is a visual companion that sits between high-level planning and day-to-day execution.
Before a Project or Task Kicks Off
When you are scoping a project that spans several weeks, the initial planning phase often involves laying out milestones, deadlines, and dependencies. A 3D calendar rendering gives you a bird's-eye view of the entire month before you dive into details. You can place major milestones on specific dates, adjust for weekends or holidays, and see how tasks distribute across weeks. The depth cues help you notice when too many deadlines cluster in a short window, something a flat calendar might downplay.
For example, if you are launching a product in late June, you can render the month and visually identify that the second week has a major client deliverable and a team offsite on the same day. That spatial awareness lets you shift tasks earlier or later before the crunch hits.
During Active Work and Execution
Once you are in the middle of June, the 3D rendering becomes a reference point. You can update it weekly, adding completed tasks, shifting incomplete items, or marking new priorities. The visual depth helps you track progress at a glance. If you use an interactive version, you can click into a date to see associated notes or links to project files. This keeps your planning surface alive without requiring constant context switching.
For team workflows, a shared 3D calendar render on a display screen or in a collaboration tool gives everyone the same mental model of the month. Instead of asking "When is the review meeting?" repeatedly, team members can glance at the spatial layout and see the review meeting sits between the design handoff and the testing block. That visual context reduces back-and-forth.
After Completion for Review and Retrospectives
Post-project, the rendered calendar can serve as a record of how the month unfolded. You can look back at the original plan versus what actually happened. The 3D format makes it easier to discuss scheduling issues during retrospectives. Instead of abstract dates, you have a visual timeline that everyone can reference.
If you are a solo creator or freelancer, this retrospective view helps you assess your own time management. Did you underestimate the time needed for certain tasks? Did you overload one week while leaving another sparse? The spatial layout makes those patterns visible.
How It Interacts with Other Tools and Methods
A June Calendar Month 3D Rendering does not exist in isolation. It integrates with your existing tool stack in practical ways.
- Project management platforms: You can export key dates from tools like Trello, Asana, or Notion and map them onto your 3D calendar. The rendering then becomes a visual dashboard for your project timeline.
- Design software: If you use Blender, Cinema 4D, or even Canva with 3D elements, you can build custom calendar renders that match your brand or personal aesthetic. This is especially useful for content creators who want to share a monthly plan with their audience.
- Planning methods: The 3D calendar complements time-blocking, the Eisenhower matrix, or agile sprints. You can overlay sprint cycles onto the month view, mark priority zones with color-coded depth, or highlight focus days with raised blocks.
- Physical boards: If you print the rendering, it works as a large-format poster or a whiteboard overlay. Some teams print a high-res version and use dry-erase markers to update it weekly.
The rendering also interacts with decision-making. When you need to choose between two project timelines, seeing them both rendered in 3D side by side helps you compare workload distribution visually. The depth and spacing make it obvious which option is more balanced.
Practical Implementation Tips
Integrating a June Calendar Month 3D Rendering into your routine does not require advanced 3D skills. Here are practical ways to start.
Choose the Right Level of Detail
Not every workflow needs a photorealistic 3D calendar. A simple isometric render with clear date blocks and event labels is often more useful than a highly textured scene. Focus on readability first. Use contrasting colors for weekends, holidays, and deadline days. Keep the perspective angle consistent so the viewer can scan left to right without confusion.
Set Up a Weekly Update Rhythm
A 3D calendar is most effective when it stays current. Set aside 15 minutes every Monday to update the render with new tasks or shifts. If you are using a digital interactive version, link each date block to a note or a task URL. This turns the calendar into a hub rather than just a picture.
Use Depth to Signal Priority
One advantage of 3D rendering is the ability to use physical depth as a signal. Raise high-priority dates slightly above others, or use shadow intensity to indicate workload heaviness. A date with three deadlines could cast a deeper shadow, visually communicating density. This is a subtle but powerful cue that flat calendars cannot replicate.
Test Both Digital and Printed Formats
A digital render works well for remote teams and personal devices. A printed version, even on standard paper, can be taped to a wall and updated with sticky notes. Some users find the physical presence of a printed 3D calendar more motivating. Try both and see which format you actually refer to during the week.
Factors That Affect Quality and Consistency
Getting value from a June Calendar Month 3D Rendering depends on a few practical factors.
Preparation matters. Before you build the render, list all known events, deadlines, and recurring tasks for June. A complete data set makes the rendering accurate. If you add events after the render is done, the visual loses its reliability.
Compatibility with your other tools is critical. If your project manager exports dates in CSV format, make sure your rendering tool can import that. If you use Google Calendar, look for tools that connect directly to your calendar feed. The less manual data entry, the more likely you will maintain the render week after week.
Usability over polish. A highly detailed render with complex lighting might look impressive, but if you cannot quickly identify the 15th of June, the visual fails its purpose. Prioritize clarity over aesthetics. Use readable fonts, consistent date spacing, and a logical week layout.
Organization of your workflow around the calendar helps. Decide whether the render is your primary planning surface or a secondary reference. If it is primary, keep it open in a browser tab or on a monitor. If it is secondary, update it after your main task manager.
Consistency in how you mark events matters. Use the same color codes, icon positions, and depth cues week after week. When the system feels familiar, you spend less time interpreting and more time acting.
Quality control means checking your render for errors. A missed date, a shifted week, or a misaligned event label can cause confusion. Before sharing the calendar with a team or using it for your own planning, verify that all 30 days of June are correct and that the rendering matches your actual schedule.
Long-Term Use Across Multiple Months
Once you build a June Calendar Month 3D Rendering, the process can be repeated for any month. The skills you develop, setting up a 3D scene, importing data, applying depth cues, and updating rhythm, apply to July, August, and beyond. Over time, you build a visual archive of your planning history. That archive becomes a reference for estimating future projects.
If you manage recurring work, such as quarterly reports or seasonal campaigns, you can reuse the same 3D calendar template each year. Adjust the dates and events, but keep the visual structure. This consistency reduces setup time and makes year-over-year comparisons easier.
For teams, the long-term benefit is shared visual literacy. Everyone understands how to read the depth cues, where to find deadlines, and how the month view relates to the overall project timeline. That shared understanding saves time in meetings and reduces miscommunication.
Final Observations on Integration
A June Calendar Month 3D Rendering is not a gimmick. It is a practical planning aid that leverages spatial perception to make time more tangible. The depth dimension helps you see patterns that flat calendars hide. It works before, during, and after projects. It interacts with your existing tools. And it can be tailored to your specific workflow, whether you work alone or in a team.
The real value comes from using it consistently. A one-time render might look nice, but a weekly updated calendar becomes a decision-making tool. Start simple. Pick one June workflow, build a basic 3D render, and see how it changes your view of the month. From there, refine the detail, expand the use, and let the depth guide your planning.