Getting the Most from a Multilayer 3D Mandala Design Cut File
If you have ever admired a layered mandala project online and wondered how to achieve that polished, dimensional look without wasting materials or time, you are not alone. A multilayer 3D mandala design cut file offers a rewarding way to create intricate decorative pieces, but the difference between a frustrating experience and a beautiful finished project often comes down to a few key details. Many people jump in expecting straightforward assembly, only to discover that alignment, material choice, and file preparation matter far more than anticipated.
Why These Files Deserve a Closer Look
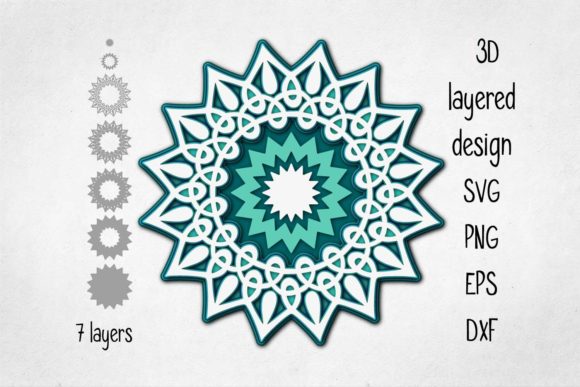
A multilayer 3D mandala design cut file is precisely what the name suggests: a digital cutting file composed of several nested layers that, when stacked with spacers or foam dots, create a raised, three-dimensional mandala pattern. These files work with machines like Cricut, Silhouette, or laser cutters, and the finished pieces are popular for wall art, greeting cards, home decor, and even wedding decorations. The appeal lies in the stunning depth and shadow play that a flat print simply cannot match.
However, the complexity of these files introduces pitfalls that can turn an exciting project into a pile of wasted cardstock. Understanding these common mistakes beforehand will save you time, money, and frustration.
Overlooking File Compatibility and Format
One of the first oversights happens before a single cut is made. Many beginners assume that any multilayer 3D mandala design cut file will work seamlessly with their machine. The reality is that file formats matter a great deal. A file designed for a laser cutter often uses DXF or SVG formats, while a Cricut user typically needs a cut-ready SVG with clearly separated layers. Using the wrong format can result in misaligned cuts, missing details, or a file that simply refuses to load.
What to check before downloading
Look at the product description carefully. Reputable designers specify which machines and software their files are tested with. If you use a Cricut Maker, confirm that the file includes labeled layers and is tested in Design Space. For Silhouette users, ensure compatibility with Studio. If the listing is vague, reach out to the seller or look for user reviews that mention successful cuts on your exact machine. Investing a few extra minutes here prevents the disappointment of an unusable purchase.
Ignoring Layer Count and Spacer Requirements
Another frequent mistake is underestimating the assembly process. A twelve-layer mandala looks spectacular, but it also demands precise spacing and stacking. Some files require foam dots or chipboard spacers between each layer; others use a tab-and-slot system. Failing to read the instructions or assuming you can improvise often leads to uneven layers that sag, tilt, or collapse.
Before you begin, determine whether the file includes built-in spacing guides or if you need to supply your own foam squares. If the design relies on tabs, test a single layer set first to ensure fit. Many experienced creators keep a variety of foam thicknesses on hand—1mm, 2mm, and 3mm—so they can adjust the depth to match the desired effect. Planning for these materials ahead of time makes the assembly process smooth and satisfying.
Choosing the Wrong Material for the Job
The material you cut dramatically affects both the ease of assembly and the final appearance. Heavy cardstock (at least 80 lb or 216 gsm) is a common choice because it holds shape well without being too thick for intricate cuts. However, some multilayer 3D mandala design cut files look best with metallic or pearlescent paper, while others benefit from a frosted acetate layer for a subtle translucency.
A mistake I see often is using lightweight printer paper to save money. The layers buckle under the weight of the spacers, the tabs tear during assembly, and the overall effect looks flimsy rather than elegant. Similarly, using material that is too thick—like chipboard—without adjusting blade depth or pressure can cause the machine to skip cuts or leave uncrisp edges. Always test a small section of the design on your chosen material before cutting the entire file. Adjust settings based on the material, not the default suggested by the file name.
Misunderstanding Scale and Size
Because multilayer 3D mandala design cut files are often shown in highly stylized marketing images, it is easy to misjudge the actual size. A file designed to fit an 8x10 inch frame will look very different scaled up to 12x12 inches. Scaling changes the thickness of the lines and the fit of the tabs. When you enlarge a delicate design, the narrow bridges may become too thick, and the small connecting slots may no longer align.
Test scaling before committing
Open the file in your design software and look at the dimensions. If the original is 8 inches wide and you want a 16-inch finished piece, know that you might need to thicken some elements or add extra registration marks for alignment. Many designers include a recommended size range in the file description. Respect that range. If you must go larger or smaller, plan on making a prototype from inexpensive cardstock first. That single test cut can save you from wasting expensive specialty paper.
Skipping the Assembly Order Check
Perhaps the most overlooked step is understanding the assembly order before cutting begins. A multilayer 3D mandala design cut file typically has a base layer, several intermediate layers, and a top layer. Some layers may need to be cut from the same material, while others require contrasting colors. Without a clear assembly guide, it is easy to cut all layers from one color, only to realize at assembly time that you need specific layers in different shades to create the desired depth.
The best approach is to label each layer in your design software or write directly on the mat before cutting. Some designers provide a PDF instruction sheet with a color map. If not, create your own: assign a number to each layer and note the material or color you plan to use. When you cut, keep the layers organized in separate envelopes or use a stacking tray. This small habit prevents the frantic sorting that often leads to misplaced pieces.
Rushing the Weed and Detail Work
Weeding—removing the excess material from around the cut design—is where patience pays off. Multilayer mandalas often contain tiny interior cutouts that are essential to the overall pattern. Rushing through weeding with a dull hook tool can tear those delicate sections, leaving gaps or rough edges. A torn inner circle might not seem significant, but when stacked, it can create an uneven shadow that distracts from the symmetry.
Use a light box or bright window to see the cut lines clearly. Work from the inside out, removing the smallest pieces first. If you accidentally break a thin bridge, a tiny dab of quick-drying glue can repair it, but prevention is better. Keep your blade sharp and your weeding tools fine-tipped. The time spent on careful weeding is time saved on trying to disguise damaged layers later.
Forgetting About Adhesive and Positioning
Even a perfectly cut and weeded multilayer 3D mandala design cut file can fall apart if the adhesive is chosen poorly. Wet glue causes paper to warp; glue sticks may not provide enough hold for layers that need to stand upright or be handled. Foam adhesive dots or strips are popular because they add spacer height and grip strongly. However, not all foam adhesives are equal. Some lose their tack over time, especially in humid conditions, causing layers to shift or peel away.
Test your adhesive on a small scrap before applying it to the final piece. If you are shipping a finished mandala or displaying it in a high-traffic area, consider using a permanent foam adhesive or a strong double-sided tape designed for cardstock. Position each layer carefully—once foam adhesive makes contact, repositioning is difficult without tearing the paper. Use tweezers or a positioning tool to align layers precisely before pressing down.
Neglecting to Back Up the File
This sounds like basic advice, but it is surprisingly common to lose the original file after cutting. A multilayer 3D mandala design cut file may be purchased only once, and if you need to make a replacement layer or a different color version, a missing file means buying it again or improvising. Save your purchased files in a dedicated folder on your computer and in cloud storage. Name them clearly with the designer name, file title, and date. When you modify the file—by resizing or changing layer colors—save that modified version as a separate copy. This way, you always have the original ready for future projects.
Selecting a Quality File from the Start
Not all multilayer 3D mandala design cut files are created equal. Some are designed by experienced artists who test their files rigorously; others are hastily converted from low-resolution images. A lower-quality file often has jagged edges, inconsistent line weights, or tabs that do not line up. You can spot these by reading reviews that mention misalignment, difficulty weeding, or lack of clear instructions.
Look for designers who show close-up photos of the layered assembly, provide a materials list, and specify the exact file formats included. A good file will have separate layers clearly named, a PDF assembly guide, and often a test cut file so you can verify settings before committing to the full project. Spending a few dollars more on a well-designed file is far cheaper than wasting expensive paper and hours of effort on a frustrating design.
Practical Advice for a Smooth Experience
- Start with a simple design. If you are new to multilayer files, choose one with three to five layers rather than ten or more. Build confidence before tackling complexity.
- Use a cutting mat with good grip. A mat that has lost its tack can allow material to shift, ruining alignment. Replace mats regularly or use painter’s tape to secure edges.
- Keep a project journal. Note the material, settings, adhesive, and assembly order that worked well. This reference becomes invaluable for future projects.
- Join communities of fellow creators. Online groups focused on papercraft or die-cutting often share tips specific to multilayer designs. You can learn which files cut well and which to avoid.
- Practice on scrap material before using premium paper. A quick test cut ensures your settings are correct and that the file is compatible with your machine.
Wrapping It Up with Confidence
A multilayer 3D mandala design cut file can be a source of immense creative satisfaction, but the path to a stunning finished piece is paved with careful preparation. By checking file compatibility, selecting the right materials, understanding assembly order, and investing in quality designs, you avoid the common frustrations that turn a promising project into a lesson in patience. The beauty of these files is that, with the right approach, they reward you with dimensional art that looks far more complex than the effort required. Take your time, test as you go, and enjoy the process of bringing a layered mandala to life.