Thank You 35k Followers 3D Render: A Practical Workflow for Celebrating Audience Milestones
Reaching 35,000 followers is a significant achievement for any creator, brand, or business. It marks a point where your community has grown from a handful of early supporters to a substantial audience. How you acknowledge this milestone matters. A generic text post can feel impersonal, while a Thank You 35k Followers 3D Render offers a visual, memorable, and brand-aligned way to express gratitude. This article explains what that type of asset is, where it fits into a broader content and marketing process, and how to use it effectively—whether you create it yourself or commission it. We’ll focus on practical implementation, workflow integration, and long-term value, avoiding hype and focusing on what actually works.
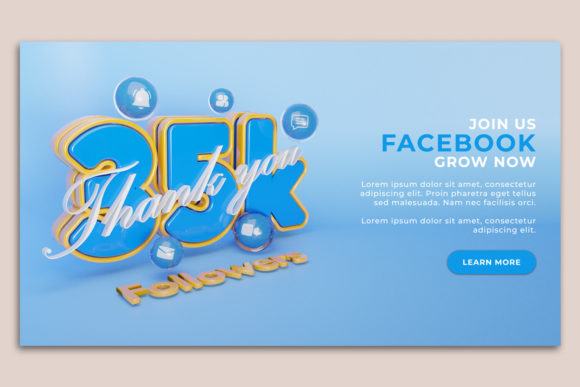
What is a Thank You 35k Followers 3D Render?
A 3D render in this context is a custom graphic that uses three-dimensional modeling and rendering software to produce a static or animated image celebrating the follower count. Typically it includes the number “35k” or “35,000,” often integrated into a scene with lighting, textures, and depth. It might show the number floating in a virtual space, composed of reflective materials, or surrounded by elements that represent your brand—like colors, icons, or product shapes. The final render is then used as a social media post, profile picture, website banner, email header, or even printed merchandise.
This asset sits at the intersection of audience appreciation and content marketing. It is not just a “thank you”; it is a visual statement that reinforces your brand identity, shows you invest in your community, and creates a shareable piece of content. Unlike a flat 2D graphic, a 3D render conveys a sense of effort and sophistication, which can positively affect how your audience perceives your brand.
Where Does a 3D Render Fit in Your Workflow?
The Thank You 35k Followers 3D Render is not an isolated item. It is part of a larger process that includes planning, creation, deployment, and measurement. Understanding where it fits helps you allocate resources and timing correctly.
Before the Milestone: Preparation Phase
Many people wait until they hit 35k and then scramble to create something. That often leads to rushed designs or missed opportunities. Instead, treat the render as part of your milestone trigger workflow. Once you cross 30k or 34k, start planning the celebration. If you are creating the render yourself, set aside time in your content calendar. If you are outsourcing, contact a 3D artist a few weeks before you expect to hit the number. Have backup templates that only need the number changed—this is especially useful if you anticipate hitting multiple milestones quickly. Preparing ahead means you can post within hours of the milestone, capitalizing on the momentum of the achievement.
During the Celebration: Launch and Engagement
When you publish the render, it typically becomes the centerpiece of a multi-channel thank-you campaign. On Instagram or LinkedIn, it might be a single image post with a heartfelt caption. On Twitter, it could be paired with a short video loop of the render rotating. On your website, you might replace your hero banner for a few days. The render is the anchor, but it interacts with other assets: a written thank-you note, a call-to-action (like asking followers to share their favorite content from you), or even a giveaway tied to the milestone. The render’s visual appeal increases shareability, which can bring in new followers during the celebration window.
After the Milestone: Repurposing and Archiving
Once the celebration week is over, do not let the render gather dust. The same 3D file can be repurposed for other milestones by adjusting the number. If you used Blender or Cinema 4D, changing “35k” to “40k” takes minutes if the scene is parametric. Additionally, the render can be used in email newsletters as a “wall of gratitude” graphic, or printed as a small poster for your office or studio. You can also create a wallpaper version for your community to download. Archiving the project file with proper naming and folder structure ensures you can reuse it efficiently later. This is where organization and consistency pay off: store textures, fonts, and lighting presets alongside the render file so future edits are seamless.
Interaction with Tools, Platforms, and People
A 3D render does not exist in a vacuum. Its creation and deployment involve multiple tools and collaborators. Understanding these interactions helps you streamline the process.
- 3D Software: Blender (free), Cinema 4D, Maya, or web-based tools like Spline or Vectary. Choose based on your skill level and budget. For quick results, templates from marketplaces can be customized.
- Graphic Design Tools: After rendering, you might need to composite the image with brand overlays in Photoshop or Canva. This is where you add your logo, handle, or a subtle shadow.
- Social Media Platforms: Each platform has different image size requirements. Render at a high resolution (e.g., 3840x2160) and then export versions for Instagram (1080x1080), LinkedIn banner (1584x396), Twitter header (1500x500), etc. Use a tool like Figma to create platform-specific mockups from the same render.
- Scheduling and Analytics: Use tools like Buffer, Hootsuite, or Later to schedule the post at a time when your audience is most active. After posting, monitor engagement metrics—likes, shares, comments, and follower growth—to see if the render outperformed your usual posts. This data informs whether you continue investing in 3D renders for future milestones.
- People: If you are a solo creator, you might be the designer and copywriter. In a team, coordinate between the 3D artist, social media manager, and copywriter. Ensure the render’s style matches the brand guidelines (colors, typography, mood). A brief that includes “thank you 35k followers 3D render” as the deliverable helps everyone stay aligned.
Practical Implementation Tips
To get the most out of your Thank You 35k Followers 3D Render, consider these factors from preparation to final output.
Preparation and Planning
- Set a clear milestone threshold: Decide whether 35k is a hard number or a range. If you are close, you can post when you reach exactly 35,000 or celebrate the achievement after a few days of stability. The render should not feel dated if the number changes.
- Design for flexibility: Use a modular 3D scene where the number is a separate object. That way, you can swap it out for the next milestone without rebuilding the scene. Store the number in a separate layer or collection.
- Consider motion: A simple rotation or camera pan can make the render more engaging for video-heavy platforms like TikTok, Instagram Reels, or LinkedIn. Render a short 5-second loop in addition to the static image.
Usability and Compatibility
- File formats: For static images, PNG with transparency is ideal if you plan to overlay on different backgrounds. For video, MP4 with H.264 codec works across most platforms. If you use a dark background, ensure the text is legible on both light and dark mode.
- Responsive design: The render should work as a profile picture (circular crop) and as a banner (wide aspect). Test the crop on mobile and desktop. Use safe zones so key elements like the number are not cut off.
- Accessibility: Add alt text to the image describing it as “3D render of the number 35k with golden metallic texture on a dark blue gradient background.” This helps screen readers and also contributes to SEO if used on a website.
Efficiency and Quality Control
- Render settings: Use sufficient samples for clean anti-aliasing, but balance against file size. For social media, 1080p is often enough; 4K is overkill unless you plan to print. Use denoising in your renderer to reduce render time.
- Quality checks: Look for artifacts, jagged edges, or incorrect lighting. Check the render on an actual device at actual size, not just on your high-res monitor. Ask a colleague to review for any spelling errors (e.g., “35” instead of “35k”).
- Version control: Save iterations clearly: “thankyou_35k_v1.blend,” “thankyou_35k_v2.blend.” Keep the final exported PNGs in an “Exports” folder with date stamps. This prevents confusion when you need to reuse the file later.
Integrating the Render into Your Routine
Whether you are a small business owner, a blogger, a freelancer, or a marketer, the Thank You 35k Followers 3D Render can become a standard part of your milestone process. Here are a few workflow examples tailored to different roles.
For a Solo Creator or Freelancer
You likely manage everything yourself. Use a tool like Spline (free, web-based) to create a simple 3D text without learning complex software. Spend 30-60 minutes on the design. Then in Canva, add your brand colors and a subtle shadow. Schedule the post on your social media. In the caption, mention that you personally made the render—it adds authenticity and shows effort. After posting, reply to as many comments as possible to convert gratitude into deeper engagement. Save the Spline project file in your cloud storage with a clear name like “Milestone_Render_Spline.”
For a Marketing Team
When a milestone is approaching, the social media manager triggers a request to the design team. A brief should specify: “We need a 3D render of ‘35k’ in our brand font, using our secondary color palette, with a subtle particle effect. Deliverables: one static square 1080x1080, one horizontal 1920x1080 for the website, and one 10-second loop for Instagram Reels. Deadline: two days before expected milestone date.” The design team creates the render in Cinema 4D, composites in Photoshop, exports the variations, and uploads to a shared asset library. The social manager then schedules the posts and monitors analytics. After the campaign, the team reviews engagement and decides if the same style should be used for the next milestone (e.g., 50k). This creates a consistent visual language for celebrations.
For an Educator or Course Creator
You might celebrate 35k students or subscribers. Use the render as a thank-you image in your learning platform or in a community post. Pair it with a short video message. Additionally, you can turn the render into a downloadable certificate or wallpaper for your students, reinforcing a sense of belonging. The render becomes a shared badge of the community’s growth, not just your own.
Long-Term Considerations
Creating a 3D render for a milestone is an investment in your brand’s visual identity. Over time, you can build a library of milestone renders that show your growth journey. This can be compiled into an annual recap or a timeline graphic. For example, a collage of “Thank You 10k,” “Thank You 25k,” “Thank You 35k” renders shows your audience how far you have come, and it tells a story that resonates more than numbers alone.
When you commission or create a render, consider licensing. If you buy a template from a marketplace, check the license for commercial use and modification rights. If you hire a freelancer, ensure you have full rights to the asset, especially if you plan to use it in paid ads or merchandise. Keep contracts and receipts in your asset folder.
Finally, remember that a Thank You 35k Followers 3D Render is just one piece of a larger relationship-building strategy. The render gets attention, but the real value comes from the genuine interaction that follows. Use the milestone as an opportunity to listen to your audience—ask them what they want next, or share a behind-the-scenes look at your creative process. When you combine a high-quality visual with meaningful human connection, you reinforce why people follow you in the first place.