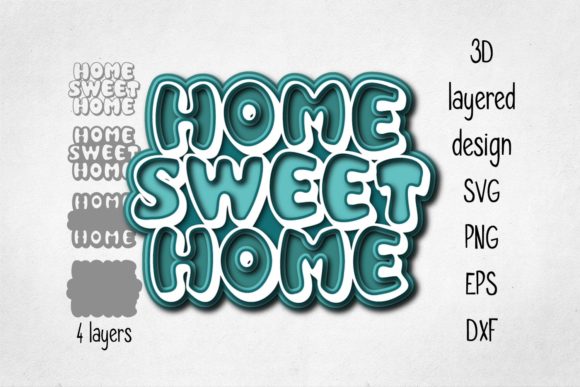
3D Layered Home Sweet Home: Creative Applications
If you have encountered the concept of a 3D layered Home Sweet Home design, you already know it is more than a decorative phrase. It is a way of building visual depth and emotional resonance using stacked elements, shadow play, and dimensional contrast. Whether you are a designer exploring new formats, a small business owner creating custom products, or a hobbyist looking for a meaningful project, this approach offers a flexible framework that works across media, materials, and audiences.
This article walks through what makes the technique compelling, how different creators can adapt it for their goals, and practical ways to keep your results clear, organized, and audience-friendly.
What Makes a 3D Layered Home Sweet Home Design Interesting?
At its core, a 3D layered composition builds a scene by stacking multiple cut or printed layers—typically paper, cardstock, wood, acrylic, or even digital elements—spaced apart to create a sense of depth. The theme often centers on home, comfort, or belonging, making it inherently relatable. The visual effect transforms a flat sentiment into something tactile and dimensional.
What makes this format useful is its adaptability. You can scale it from a small shadow box frame to a large wall installation. You can produce it digitally for social media or physically for gifts and merchandise. The layered structure naturally guides the viewer's eye through the composition, while the theme provides immediate emotional connection.
Who Can Use This Approach and Why It Works
Different audiences find value in layered dimensional designs for different reasons. Here is how various creators and professionals can adapt the idea:
- Graphic designers and illustrators can use layered scenes in branding materials, website headers, or social media posts to add a sense of depth without relying on heavy animation.
- Small business owners and Etsy sellers can create physical products—laser-cut wooden signs, papercut shadow boxes, or card kits—that appeal to customers looking for personalized home decor.
- Bloggers and content creators can feature step-by-step tutorials or design templates, attracting audiences interested in DIY crafts, digital design, or room styling.
- Educators and workshop leaders can use the layered approach to teach composition, color theory, or spatial thinking in a hands-on way.
- Freelancers and publishers can offer ready-made templates or print files for subscribers, building a library of resources that serve a recurring need.
The shared benefit is that the concept is easy to grasp visually, yet offers enough room for originality to keep each project distinctive. You are not locked into one style—you can shift between minimalist, rustic, whimsical, or modern depending on your audience.
Creative Possibilities and Variations to Explore
Once you start thinking in layers, the options multiply. Here are several directions you can take, each with its own feel and practical considerations.
Papercut Shadow Boxes
One of the most popular physical formats uses multiple sheets of cardstock stacked in a shadow box frame. Each layer is cut with a silhouette of a house, tree, clouds, or lettering. By spacing them with foam tape or small spacers, you create a miniature diorama that changes appearance with lighting.
For a cohesive look, stick to a limited palette—three to five colors that share a tone or theme. Neutrals with a single accent color keep the design calm. If you want to appeal to a younger audience, consider pastels or jewel tones. The key is to plan which elements appear on each layer so that the eye moves naturally from background to foreground.
Laser-Cut Wood or Acrylic Signs
If you have access to a laser cutter, wood or acrylic adds durability and a premium feel. A layered wooden sign with the words and a house silhouette can become a lasting gift or product. Contrast between the natural wood tones or the transparency of acrylic adds another dimension.
When designing for laser cutting, remember that each layer needs a supporting frame or backing to keep the alignment clean. Thin materials (1/8 inch or less) work best for multiple layers, while thicker stock suits a two-layer approach. Test the spacing between layers so that the shadows fall predictably.
Digital Versions for Web and Social
Not every application needs to be physical. You can recreate the layered look in design software like Illustrator, Procreate, or Canva by simulating drop shadows, offset layers, or using clipping masks. Digital versions are perfect for:
- Social media graphics for a cozy home brand
- Email newsletter headers that feel warm and dimensional
- Print-on-demand products such as posters, cards, or phone cases
In digital formats, pay attention to the direction and softness of shadows. A consistent light angle across all layers makes the depth feel real. You can also animate the layers subtly—shifting them slightly on hover or in a short video loop.
Mixed Media and Upcycled Materials
For hobbyists or educators who prefer a tactile approach, consider using fabric, felt, cardboard, or reclaimed materials. A layered 3D layered Home Sweet Home piece made from recycled cardboard and fabric scraps can carry a handmade charm that resonates with eco-conscious audiences.
The process here is less about precision and more about texture. Use contrasting materials—burlap for the background, felt for the house shape, thin wood veneer for the lettering. The uneven edges and natural imperfections become part of the aesthetic.
Practical Inspiration for Specific Goals
To make the concept actionable, here are three realistic scenarios with specific recommendations.
Scenario One: A small business owner wants a product line for the holiday season.
Create a set of three layered shadow box designs: one with a classic house and trees, one with a winter cottage, and one with a simple lettering piece. Use consistent colors across the series (cream, deep green, warm red). Price them as mid-range decor items. Offer a kit version for customers who prefer to assemble at home. This gives you two price points with the same design work.
Scenario Two: A blogger needs a tutorial that will appeal to beginner crafters.
Focus on a digital template approach. Provide a free PDF with three layers that readers can print and cut with scissors. Use simple shapes—no intricate curves—so the project is achievable in one sitting. Show photos of each assembly step. The post can link to a more advanced version with five layers for those who want a challenge.
Scenario Three: A graphic designer wants to refresh a client's brand visuals for a real estate website.
Use a layered composition as the hero image on the homepage. The layers could represent a neighborhood skyline, a central house, and the company name. The depth conveys stability and home. Keep the palette in line with the brand's existing colors. The design works as a static header or as a subtle parallax element on scroll.
How to Keep Results Clear and Organized
Layered designs can quickly become busy if you add too many elements or colors. Clarity matters, especially when the piece is meant to communicate a specific message or brand.
- Limit layers to three to five. More layers can make the piece feel cluttered and are harder to produce consistently.
- Plan the depth of each layer. Decide which elements belong to the background, midground, and foreground before you start cutting. Background elements should be simpler and lighter in value.
- Use consistent spacing. If you are using foam tape, keep the same thickness between layers so the overall depth is predictable.
- Choose a focal point. Let the main element—usually the house or the lettering—sit on the most prominent layer. Everything else supports it.
- Test before scaling. Run a small prototype before producing multiple copies. This catches alignment issues, color mismatches, or spacing problems early.
Ensuring Originality and Audience Fit
Because the layered look is popular, you want each piece to feel distinct rather than generic. Here are ways to bring originality without reinventing the technique:
- Customize the silhouette to a specific location—a local landmark, a regional tree species, or a recognizable roofline.
- Combine the theme with a personal message or family name.
- Use a color palette drawn from a specific season or interior style.
- Add a small unexpected detail on the back layer, like a hidden sun or bird, that reveals itself on closer inspection.
When designing for others, research their preferences first. A minimalist audience will respond to clean lines and neutral tones. A farmhouse-style market will expect rustic textures and warm browns. Knowing the audience keeps your work relevant and reduces the risk of creating something that looks beautiful but never sells or gets shared.
Final Thoughts on Creative Direction
The 3D layered Home Sweet Home format is not a trend you need to chase. It is a durable design strategy that works for physical products, digital content, and teaching tools alike. Its strength lies in how it combines a universal theme with a visual technique that feels dimensional and personal.
Whether you are laser-cutting a prototype for a product line, designing a layered header for a blog, or teaching a workshop on spatial composition, you can adapt the same core idea to fit your medium and your audience. Start with a clear plan, test your layers, and let the depth do the storytelling.