Layered Easter Egg Cut File for Creative Projects
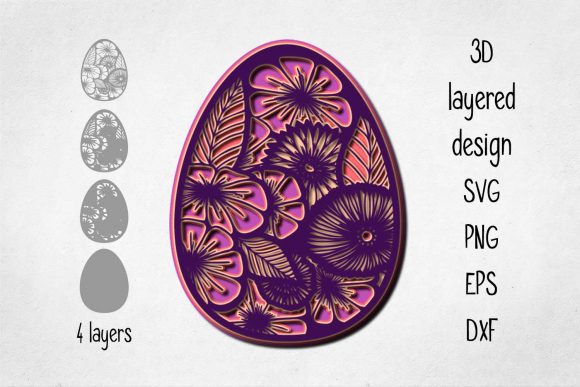
A layered Easter egg cut file offers a template designed for cutting machines such as Cricut, Silhouette, or Brother ScanNCut. Instead of a single flat shape, the design builds an Easter egg from multiple pieces of material stacked on top of each other. Each layer adds color, depth, and detail, so the finished piece carries a dimensional look similar to a cardstock sculpture. You can adjust the number of layers, swap colors, or scale the design to fit different projects. Because the file is digital, you download, cut, and assemble it yourself.
This type of template appeals to a wide range of people, but the way each person uses it depends on their goals, skill level, and project context. Some want quick decor for a family gathering. Others need a reliable design for selling finished crafts. A few see it as a teaching tool. Understanding how a layered Easter egg cut file fits your own scenario helps you pick the right design and avoid wasted time or materials.
What a Layered Easter Egg Cut File Offers
A layered design differs from a standard print-and-cut image. With a layered egg, you cut each color from separate sheets of cardstock, adhesive vinyl, or other material. Then you stack them in sequence, usually with foam adhesive between layers to create visible depth. The result looks handmade and intentional, with shadows and highlights that feel richer than a flat print.
For someone making Easter decorations at home, that depth means the egg stands out on a door, window, or mantel. For a small business owner, it signals quality that customers notice. For a classroom teacher, the same structure becomes a hands-on lesson about sequencing, color matching, and fine motor skills. The file format itself is neutral, so you decide how many layers to include and how complex the finished piece becomes.
How Different People Approach a Layered Easter Egg Cut File
Not everyone needs the same thing from a cut file. A beginner may worry about blade settings and material waste. A professional crafter may focus on design flexibility and commercial licensing. An educator may prioritize clear assembly instructions. Rather than treating the file as a one-size-fits-all product, it helps to match it to your own context.
Beginners Looking for a Reliable First Project
If you are new to cutting machines, a layered Easter egg cut file can be a smart starting point. Easter eggs have simple curves and familiar shapes, which reduces the risk of tearing delicate material. Many layered designs include a base layer that hides minor alignment errors, so you can learn without frustration.
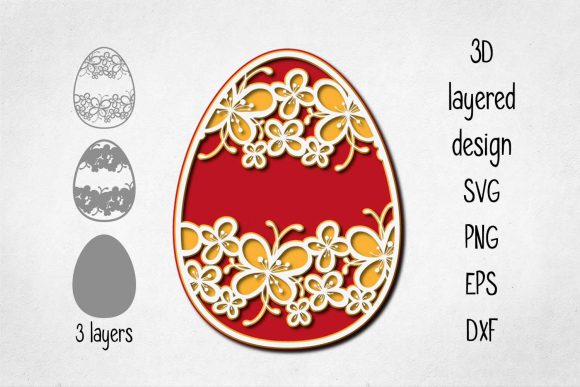
When choosing a file, look for one that specifies exact layer counts and suggests materials. A three-layer egg is more forgiving than a six-layer version because fewer pieces need to line up. Use standard cardstock rather than lightweight paper, and place a test cut on a scrap piece to confirm your blade depth and pressure. The goal is not perfection on the first try. You want a project that teaches you how weeding, transfer, and stacking work in a real context.
If you mess up a layer, you can re-cut only that part instead of starting over. Keep spare material on hand, and remember that even experienced crafters adjust settings several times before a design cuts cleanly.
Experienced Crafters and Hobbyists Seeking Creative Flexibility
Once you are comfortable with basic cutting, a layered Easter egg cut file becomes a starting point for experimentation. You might replace the background layer with patterned paper, add glitter cardstock for the top layer, or cut the design from adhesive foil to place on a glass vase. The layered structure also responds well to embossing folders or stenciling on individual pieces before assembly.
Consider modifying the file itself. If you own software that edits SVG paths, you can merge layers to reduce complexity or add cutouts for lights or ribbon. You could also scale the design to create a large standalone display or shrink it for gift tags and card fronts. The key is that the original file gives you a reliable base, but your experience lets you adapt it without starting from scratch.
Pay attention to material cost when scaling. A large layered egg uses significantly more cardstock and adhesive foam. For a single showpiece, that is fine. For a batch of smaller items, using fewer layers or thinner materials keeps the project economical.
Small Business Owners and Entrepreneurs
If you sell finished products, a layered Easter egg cut file offers a path to items that feel premium without requiring advanced design skills. Shoppers often recognize layered cardstock decor as higher quality than flat prints, and the handmade aspect supports a higher price point. You can create eggs in seasonal color palettes, offer custom monograms on the top layer, or bundle multiple eggs as a set.
Make sure you check the commercial license for any file you purchase. Some designers allow unlimited sales, while others require attribution or cap the number of items you can produce. Respect those terms to avoid legal issues later. Keep records of where you bought each file and what the license allows.
For production efficiency, batch your work. Cut all base layers from one material type, then switch to the next color and cut all middle layers, and so on. This reduces blade changes and material waste. Invest in a deeper cut blade if you work with heavy cardstock regularly. Your speed improves when you standardize the assembly order and prepare foam squares in advance.
Consider offering a kit version. Some customers want the layered egg but do not own a cutting machine. You could sell pre-cut kits with materials and instructions. That turns the same digital file into a separate product line without extra design work.
Educators and Workshop Leaders
In a classroom or workshop setting, a layered Easter egg cut file works well for teaching both technical and creative skills. Students learn to load materials, adjust settings, and interpret digital files physically. The visible stacking reinforces spatial reasoning and planning because each layer must be cut in the correct order and orientation.
For younger participants, simplify the process. Pre-cut most layers and let them focus on assembly. For older students, have them import the file, resize it, and choose their own color combinations. The same template can serve multiple skill levels depending on how much responsibility you give the learner.
Budget matters in education. A layered file that uses five colors may look impressive, but it consumes more material and time. A three-layer design still teaches the core concepts and leaves room for decoration with markers or stickers. If you run multiple sessions, laminate a completed sample to show students the final result without handling delicate pieces repeatedly.
Marketers, Bloggers, and Content Creators
If you create content around crafting, a layered Easter egg cut file gives you a timely hook for tutorials, supply lists, and project roundups. The visual nature of layered work photographs well at each step, and the finished product looks appealing in thumbnails or social media posts. You can film the assembly process speeded up, or write a detailed guide that helps beginners avoid common mistakes.
Consider the search value. Easter-related content spikes in early spring, and layered cut files tend to attract an audience already interested in die-cutting machines. If you pair the project with a specific material like holographic cardstock or adhesive felt, you may rank for long-tail search terms that have less competition. The key is to provide real value rather than just listing supplies. Show exactly how you aligned layers, what adhesive worked best, and what went wrong on the first attempt.
For monetization, you might offer your own modified version of the cut file or a printable template for people who do not own a cutting machine. Affiliate links to cardstock packs, cutting mats, and foam squares are natural fits for this kind of content.
Evaluating Quality and Value in a Layered Easter Egg Cut File
Not every layered design delivers the same result. When you browse options, look at sample photos posted by other users rather than only the product mockup. Pay attention to how clean the edges are and whether layers align when stacked. A file that looks good in preview may have overlapping paths or missing cut lines that cause problems during production.
Check the number of layers and whether the design includes a solid base. A base layer adds stability and gives you something to attach other pieces to securely. Without it, you may struggle to keep thin parts aligned. Also consider whether the file includes a shadow or offset layer. This extra outline adds a border around the egg and makes the final piece look more polished, especially when displayed on a contrasting background.
File format matters. SVG is the most widely supported, but some machines prefer DXF, EPS, or PNG with transparent backgrounds. Confirm the format works with your software before purchasing. A good file should include separate layers grouped logically so you can hide or color each piece easily.
If you are buying for business, test the file with your specific cardstock brand before making many copies. Thicker papers may require notching or scoring to fold cleanly, while thinner papers may tear during weeding. A small test run saves you from discovering problems after cutting dozens of sets.
Deciding If a Layered Easter Egg Cut File Fits Your Project
Start by defining what success looks like. For a home decorator, success might mean a colorful egg that stays on the door for three weeks without falling apart. For a seller, success means consistent quality across twenty units and a profit margin that justifies the labor. For a teacher, success means students finish within the class period and understand how layers create depth.
Your answer determines the complexity you need. A simple three-layer egg works fine for a quick project with kids. A five-layer egg with intricate filigree suits an experienced crafter aiming for a centerpiece. If you are unsure, lean toward fewer layers. You can always add embellishments like rhinestones or ribbon later, but a design with too many parts may overwhelm and lead to abandoned projects.
Consider the time commitment. Cutting and assembling a layered egg can take anywhere from twenty minutes to two hours depending on the number of layers, material thickness, and your familiarity with the machine. Plan accordingly and avoid starting a multi-layer design the night before an event if you have limited experience.
Finally, think about long-term usefulness. A generic layered egg shape can be reused every year with different colors and patterns. A more stylized design, such as one with intricate mandala cuts, may feel dated faster. If you want a file that stays relevant, choose clean geometry that adapts to trends without needing a complete redesign.
Practical Example: A Busy Parent Creating Last-Minute Decor
You have a cutting machine but rarely use it. Easter is three days away, and you want something festive for the front door. Download a three-layer egg file that uses standard cardstock colors you already own. Cut the layers during nap time. Assemble in fifteen minutes using foam adhesive strips. The result looks intentional and takes almost no planning. You skip the expensive store-bought decor and use materials you already have.
Practical Example: A Freelancer Selling at a Spring Market
You have a booth at a local craft fair. You need products that stand out from the mass-produced items nearby. Choose a five-layer egg with a metallic top layer. Cut ten units in one evening using batching methods. Price each egg at a point that covers materials, your time, and the booth fee. The dimensional look attracts browsers, and the quality justifies the price. You sell out by early afternoon and collect emails for custom orders.
Practical Example: A Hobbyist Exploring Advanced Techniques
You have been cutting for two years and want to push your skills. Download a complex layered egg with small interior cutouts and multiple thin lines. Experiment with different cardstock weights to see which holds detail best. Try layering with partial foam tape in some spots and flat adhesive in others to vary the depth. Document your process and share photos online. You learn more from this one project than from repeating easy designs.
Making the Final Choice
A layered Easter egg cut file is a tool, not a fixed outcome. Its value depends on how well it matches your project size, material preferences, skill level, and end goal. For some, the file is a quick path to holiday decor. For others, it is a vehicle for creative growth or a reliable product for a small business. By thinking clearly about what you need before you download, you avoid wasted time and enjoy the process more. Whether you cut one egg as a gift or fifty for a market, the layered structure gives you results that feel dimensional, personal, and worth the effort.