Mastering Depth and Design: A Practical Guide to the 3D Layered SVG Shadowbox Nature 6
There is a distinct satisfaction in holding a piece of art that has physical depth—a scene where the foreground floats gently above the background, casting real shadows that shift with the light. The 3D Layered SVG Shadowbox Nature 6 offers exactly this kind of creative potential, providing a pre-designed template for crafting a dimensional, layered paper scene. While the results can be stunning, the journey from a digital file to a finished shadowbox is rarely as simple as "click, cut, and assemble." Many crafters, from beginners to experienced makers, encounter common pitfalls that can turn a relaxing weekend project into a frustrating experience. Understanding these challenges beforehand is the difference between a piece you are proud to display and one you hide in a drawer.
Decoding the Layers: More Than Just a Pretty SVG
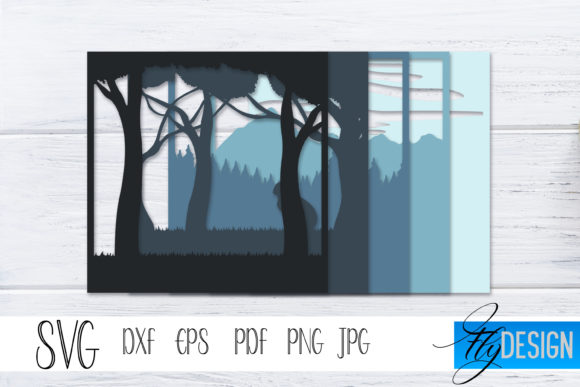
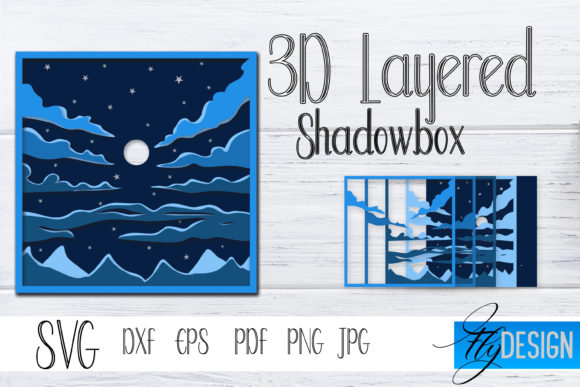
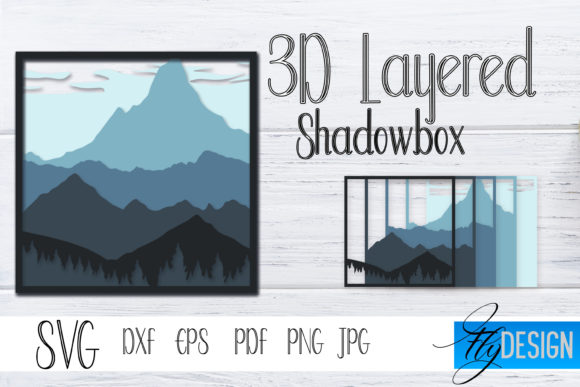
A fundamental misunderstanding often arises right at the start: what exactly is a layered SVG file? Many people treat it like a standard printable design. The 3D Layered SVG Shadowbox Nature 6 is not an image to be printed. It is a meticulously engineered set of vector cut paths, designed to be separated, cut from cardstock, and stacked with spacers to create a shadowbox effect.
The common mistake here is flattening the layers in your design software. In Cricut Design Space or Silhouette Studio, users sometimes select all elements and hit "Flatten" or "Weld" without realizing they are merging distinct depths into a single flat shape. This immediately destroys the dimensional structure of the design.
- What to check instead: When you unzip your purchased file for the Shadowbox Nature 6, open the SVG directly. You should see separate, distinct groups or mats, often labeled "Layer 1 (Back)," "Layer 2," and so on. Do not merge them. Upload each intended layer as a separate mat to preserve the layering order.
- The better approach: Keep your software organized. Use the "Ungroup" function carefully, and resist the urge to weld elements from different layers together. The magic of this craft comes from the space between the paper, not just the paper itself.
The Foundation of Success: Material, Scale, and the Frame
Even before you load your cutting mat, decisions about materials and sizing will make or break your project. The 3D Layered SVG Shadowbox Nature 6 relies on precise engineering, and deviating from its specifications without understanding the consequences is a recipe for misalignment.
The Scaling Trap
You find a beautiful Nature 6 design, but you want it bigger. It is tempting to simply drag the corner handle in your software to make the whole design fit an 8x10 frame instead of its native 5x7 size. The issue? The foam spacer tabs, which are built into the file to align the layers, are mathematically linked to the original scale. Stretching the design distorts the placement of these tabs.
- Realistic scenario: You scale up the design by 150%. The spacer tabs become wider and longer, but the areas they attach to may not have proportionally larger support structures. The result is a wobbly, unstable shadowbox that is difficult to glue.
- Practical advice: For your first build, use the native size of the file. This is the size the designer tested and optimized. If you must resize, do it proportionally (lock the aspect ratio) and inspect the spacer tab placement carefully. Be prepared to add your own foam blocks for reinforcement if needed.
Material Mismatch
Cardstock weight feels like a minor detail, but it directly affects the depth perception and structural integrity of your shadowbox. Using standard 65lb printer cardstock for a large Nature 6 shadowbox often leads to a poor outcome.
- The problem with lightweight paper: It bows and dips, especially in the larger middle layers. This ruins the crisp, clean shadow lines that make a shadowbox look professional.
- The solution: Use 80lb to 110lb cardstock for the main scenic layers. For the outermost frame or base layer, consider using 150lb cardstock or even a thin chipboard. This gives the entire shadowbox rigidity and prevents the "sagging" effect.
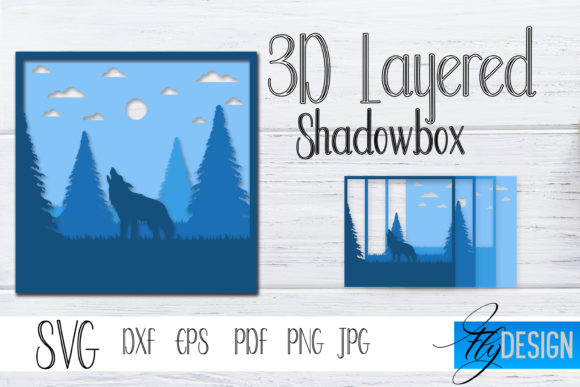
- Bonus advice: If you plan to backlight your shadowbox (a popular technique to enhance the "Nature" theme), use a lighter color or white cardstock for the back layer to allow light to pass through more effectively.
- What to check before you start: Measure the total depth of your assembled layers. For example, if you have 5 layers using 3mm foam tape, you need a frame depth of at least 15-20mm, plus room for the backing board.
- The better approach: Build your own shadowbox frame from core flute or thick chipboard. Alternatively, purchase a shadowbox frame specifically designed for 3D art before you cut the first piece of paper. The 3D Layered SVG Shadowbox Nature 6 often looks best in a simple, deep frame that does not distract from the dimensional scene.
- Common mistake: Rushing the weed using a dull tool or poor lighting. You might miss a critical small piece that connects a foreground element, leaving it visually disconnected.
- Practical advice: Use a bright light pad. A light pad behind the paper makes the cut lines highly visible. Use a sharp weeding tool, and work slowly. If a piece tears, it is often better to recut that single layer than to try and fit a broken piece into the assembly.
- Using too much tape: Tape placed across the middle of a sky or water layer can cast an unintended shadow, creating an ugly line across the finished piece. Place tape strategically around the edges and behind heavy elements.
- Using the wrong thickness: The 3D Layered SVG Shadowbox Nature 6 design may specify different depths for different layers (e.g., 1mm for subtle background shifts, 3mm for foreground pops). Mix these up, and the perspective of the scene collapses.
- The better approach: Cut your foam tape into small squares. A standard 2mm square is usually sufficient for securing most areas. This reduces bulk and makes alignment easier. Always position tape so it is hidden behind the next layer of paper.
- The scenario: You glue Layer 3 onto Layer 4, then realize that Layer 2 has a tab that needs to slide under an element on Layer 3. You must then rip them apart, potentially tearing the paper.
- Practical advice: Perform a "dry lay flat." Place all layers on a table, floating on top of each other without glue. See how the tabs and slots interact. Use the layering guide provided with the file. Work from the back layer forward, but dry-fit the front layers to confirm alignment before committing to glue.
- Poorly optimized paths: If the SVG has thousands of nodes, it will lag your cutting machine and may cut jagged edges. High-quality files have clean, smooth vector paths.
- Impossible details: Gorgeous on screen, impossible to cut. If a design has floating specks smaller than 2mm, they will either tear or be impossible to weed.
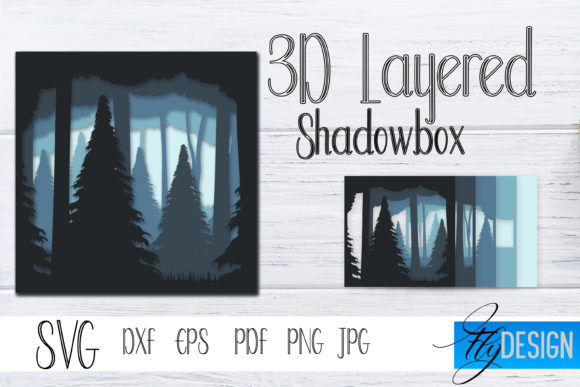
- No layering guide: A reliable file includes a clear visual guide (usually a PDF) showing what Layer 1, Layer 2, etc., should look like, and often hints on foam tape placement. If you are just given an SVG and expected to figure it out, move on.
- Real photos of the finished product: Renders can hide flaws. Look for actual photos of the assembled shadowbox to see the true depth and scale.
- Clear licensing: If you are a small business owner, check the commercial use license. Some files allow you to sell the finished product, others do not. Respecting the creator's license is part of being a professional.
- File format variety: A good file should include SVG, DXF, and PNG. This ensures it works on Cricut, Silhouette, and other machines. The Shadowbox Nature 6 design should also include a studio file for Silhouette users to preserve coloring.
Forgetting the "Box" in Shadowbox
This is perhaps the most overlooked detail. A standard picture frame is too shallow to accommodate a stacked 3D paper project. People finish a beautiful build, only to find it does not fit in their chosen frame.
The Assembly Room: Where Precision Meets Patience
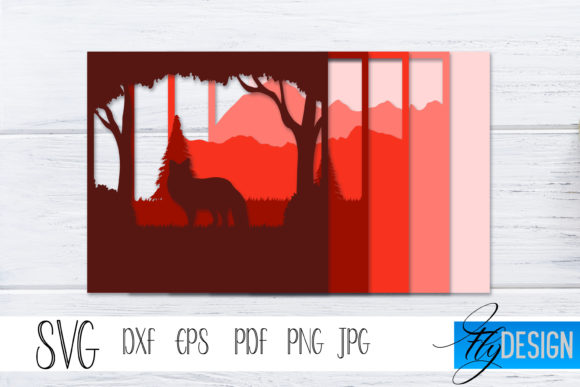
Assembly is the most rewarding, yet most challenging, phase. Many users rush this step, leading to crooked designs, visible glue marks, or layers that simply do not fit. The Shadowbox Nature 6 designs, with their intricate botanical elements, require a steady hand and a clear plan.
Weeding Without a Plan
Weeding (removing the excess paper from around your cut pieces) is where details are lost. Small stems, tiny leaves, or delicate petals can easily tear or be accidentally discarded.
Foam Tape Errors That Ruin Alignment
Foam tape is the engine of the 3D effect, but it is also the primary source of frustration. Many users apply foam tape randomly, blocking out chunks of the design, or they use strips that are visible from the front of the shadowbox.
Assembly Order Chaos
You have all five layers cut and weeded. Now what? Stacking them randomly from front to back or back to front without a dry fit is a high-risk move.
Choosing the Right Template: Evaluating Your Nature 6 Purchase
Not all layered SVG files are created equal. The popularity of the 3D Layered SVG Shadowbox Nature 6 means there are many versions floating around. Buying a poorly constructed file will sabotage your results before you even start cutting.
Red Flags in a Layered SVG File
What to Look For in a Quality File
Ultimately, creating a 3D Layered SVG Shadowbox Nature 6 is about translating digital art into a tangible, handcrafted display. By respecting the engineering of the file, choosing the right materials, and approaching assembly with patience, you move from struggling with paper to crafting a genuine piece of dimensional art. The result is not just a craft project, but a conversation piece that captures light, shadow, and texture in a way that flat prints simply cannot match.