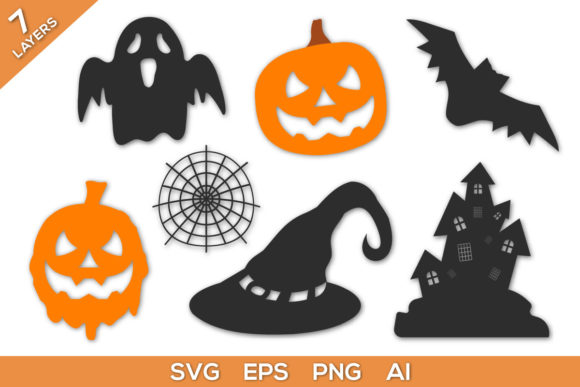
Multilayer 3D SVG Halloween Bundle for Creators
Halloween crafting has shifted from flat, one-dimensional decorations to immersive, layered designs that catch light and shadow in surprising ways. The Multilayer 3D SVG File Halloween Bundle gives you a library of ready-to-cut files that turn ordinary materials into dimensional scenes—think haunted houses with depth, jack-o'-lanterns that seem to float, and witch silhouettes with layered robes that cast their own shadows. Whether you work with paper, vinyl, or lightweight wood, these files unlock a style of making that feels polished without requiring advanced design skills.
What Makes Multilayer 3D SVG Files Different
Traditional SVGs produce flat cutouts. Multilayer designs separate a single image into multiple stacked layers—each layer cut from a different sheet of material and assembled one on top of another. The result is a shadow box effect or a raised relief that creates depth as you move around it. For Halloween, this means bats that appear to fly out from behind a moon, a graveyard scene with tombstones receding into the distance, or a cauldron with bubbling liquid that sits above the fire. The bundle typically includes 10 to 30 themed files, each pre-separated into layers so you can cut, stack, and assemble without guesswork.
Creative Applications Across Audiences and Platforms
Different makers will reach for these files for different reasons. Here is how specific users can adapt the bundle to their own goals.
Paper Crafters and Card Makers
If you create handmade cards or papercraft decor, multilayer designs transform a simple greeting into a keepsake. A layered Halloween card with a glowing window, a cat on a fence, and a starry sky behind it becomes something the recipient wants to display all season. Use cardstock in contrasting shades—matte black for the silhouette layer, vellum for the moon, and metallic orange for accents. The files work at smaller scales (4×6 inches) for cards or at full letter size for framed wall art. For consistent results, test layer order before gluing. Stack from back to front, and use foam adhesive squares between layers to amplify the 3D effect.
Vinyl Decal Designers and Small Business Owners
Vinyl crafters can use the bundle to create layered decals for tumblers, laptops, windows, or home decor. Halloween decals sell well from late September through October, and a layered design stands out on store shelves or in Etsy listings. A three-layer ghost with a glow-in-the-dark vinyl top layer, a white middle layer, and a black shadow base gives you a product that looks premium. For outdoor use, choose permanent vinyl for all layers and seal the edges with clear outdoor laminate. Keep layer counts to three or four for small decals—too many layers on a 3-inch design become hard to weed and apply. Test your weeding order: remove excess vinyl from the bottom layer first, then stack upward.
Cricut and Silhouette Hobbyists
Machine crafters who own a Cricut Maker, Explore, or Silhouette Cameo will find that multilayer files cut cleanly when you match material settings to each layer. Lightweight cardstock at 0.5 mm works for most interior layers, while a heavier 0.8 mm chipboard gives the base layer rigidity. For a shadow box frame, cut all layers at 8×8 inches and insert them into a box frame with spacers between each layer. The depth of the frame determines how many layers you can use—standard 1-inch deep frames hold five to seven layers. Label each layer in your design software by color so you can cut them in sequence without confusion.
Marketers and Content Creators
If you run a Halloween-themed social channel, blog, or email campaign, multilayer files let you create physical props for photos and video backdrops. A layered haunted house scene on a tabletop gives your flat-lay photos a sense of dimension that draws the eye. Shoot at a 45-degree angle with a single light source from one side to emphasize the shadows between layers. You can also use the files as inspiration for digital layered graphics: open the SVG in a vector editor, export each layer as a separate PNG, and animate them in a video editor to create a parallax effect. This gives your content a cohesive Halloween look without requiring illustration skills.
Educators and Workshop Leaders
Teachers and librarians running Halloween craft workshops can use the bundle as a hands-on lesson in spatial reasoning and assembly. Students cut layers from pre-printed cardstock and stack them to see how overlapping shapes create depth. Choose designs with three to five layers for younger participants and keep cutting to simple shapes—bats, pumpkins, and moons work well. Pre-cut complex layers like spiderwebs or tree branches for younger kids, and let them handle assembly and gluing. The finished pieces make excellent classroom decorations or take-home projects. For larger groups, print the SVG layers as PDF templates so students can trace and hand-cut if machines are not available.
Practical Tips for Clean, Professional Results
Multilayer projects look best when the alignment between layers is precise. A few habits will keep your stacks crisp and your finished piece gallery-ready.
- Use registration marks. Most design software can add registration marks to multi-layer files. These tiny crosshairs on each sheet help you line up layers after cutting. If your machine does not support marks, cut a small notch in the same corner of every sheet and use it as a physical alignment guide.
- Match material thickness to layer depth. Thicker materials create more pronounced shadow gaps. For a subtle 3D effect, use 65 lb cardstock for all layers and stack with thin foam tape. For a dramatic, deep look, use 80 lb or 100 lb cardstock and add chipboard spacers between layers.
- Weed before stacking. Remove excess material from each layer while the sheet is still on the cutting mat. This prevents shifting and makes it easier to see which pieces belong to which layer. Use a weeding tool with a fine tip for small details like window panes or cat whiskers.
- Test color combinations before cutting. Multilayer designs rely on contrast between layers to create the 3D illusion. Hold your chosen cardstock colors together before cutting. Dark silhouettes against a light background give the strongest effect. For a more muted look, use analogous colors like deep purple, eggplant, and charcoal.
- Store uncut files in organized folders. Rename each SVG file with the project name and number of layers. This makes it easy to find a specific design later, especially if you build a large collection from multiple bundles. Back up your files to cloud storage in case you need to re-cut a layer.
Adapting the Bundle for Different Formats
The same files can produce completely different finished products depending on the scale, material, and assembly method you choose. Here are six format ideas that all start from the same SVG bundle.
- Tabletop shadow boxes. Cut all layers from 65 lb cardstock, stack with foam spacers, and frame in a 1-inch deep shadow box. These sell well at craft fairs and fit on mantlepieces or desks.
- Window silhouettes. Cut layers from removable vinyl and apply them directly to glass. Start with a black silhouette layer, then add colored translucent layers behind it. The effect reads as a single design from outside and a layered scene from inside.
- Layered coasters. Scale the files to 4×4 inches and cut from cork, chipboard, and cardstock. Seal with clear epoxy or a laminate layer. Halloween coasters make quick gifts and sell as four-packs.
- Gift tags and treat bag toppers. Scale designs to 2×3 inches and cut from layered cardstock. Punch a hole at the top and thread with ribbon. Attach to Halloween treat bags or gift boxes for an elevated presentation.
- Garland panels. Cut three or four individual layered icons (a pumpkin, a ghost, a bat, a moon) and string them together with twine. Each panel stands alone, but the repeated multilayer style creates a cohesive garland.
- DIY lanterns. Cut layers from vellum and lightweight cardstock, then assemble around a battery-operated tea light. The vellum layers diffuse the light, while the cardstock layers cast shadows outward. Use heat-resistant materials if the lantern will be used for extended periods.
Choosing the Right Designs for Your Audience
Not every multilayer design suits every occasion. If you are selling finished pieces, pay attention to the mood and detail level of each file in the bundle. Designs with large, open areas—like a full moon or a pumpkin face—cut faster and appeal to buyers who want clean, modern decor. Intricate designs with many small cutouts, such as a detailed haunted house with shingles and window frames, take more time to weed and assemble but command higher prices from collectors and decoration enthusiasts. If you are making for your own home, mix one or two intricate statement pieces with simpler accent pieces to keep the project manageable. For children's rooms or classrooms, avoid designs with very small detached pieces that are easy to lose or break.
Working with the Files for Consistent Branding
If you are a small business owner creating a consistent line of Halloween products, the bundle helps you maintain a unified visual style across different items. Use the same set of layer colors and material textures for all your products—a signature orange, black, and silver palette, for example. Repeat the same moon silhouette across decals, cards, and home decor so customers recognize your brand. Keep the layer count consistent (three to five layers) so the production time stays predictable. When you list products online, mention that the item is made from a multilayer SVG design—this signals quality and craftsmanship to buyers who understand the effort involved.
The Multilayer 3D SVG File Halloween Bundle is more than a collection of cut files—it is a system for producing dimensional Halloween projects that feel custom and intentional. By choosing the right materials, keeping your layers organized, and adapting the designs to your audience, you can create finished pieces that look professional whether you are cutting for yourself, for customers, or for a classroom. Start with one design, test your color stack, and pay attention to how light hits the finished piece. That is where the real magic of multilayer crafting happens.